Optimizing Your Next.js App for Maximum Performance
Learn how to boost your Next.js app's performance by optimizing images, lazy-loading components, and removing unnecessary code
Introduction
Next.js is an amazing framework, but let’s be real , just because it’s optimized out of the box doesn’t mean we can’t make it even better.
In this article, I’ll talk about real-world strategies to make our Next.js apps more faster
What I Will Cover in This Article
- ✅ Image optimization
- ✅ Fonts optimization
- ✅ Third-party scripts (aka the silent performance killers)
- ✅ Cleaning up unused packages
- ✅ Lazy loading and code splitting
And of course, we’ll use Lighthouse to check if our improvements actually make a difference
I) Optimizing Images
Of course Images can make or break your website’s performance. A few unoptimized images can slow down loading speed and kill your SEO rankings
So Nextjs cames with a built in image component that automatically optimizes images , that’s means no more manually resizing or converting images to WebP formatThis is a basic exampleimport Image from "next/image";
export default function Home() {
return (
<div>
<Image
src='/images/daciaLogan.jpg'
alt="dacia logan"
width={300}
height={300}
/>
</div>
);
}
1) Fill
When you use the fill property the image will automatically adjust to fill its parent container , so you don’t need to use the width and height images but we still need to specify the aspect ratio of the parent container (using objectFit)<Image
src='/images/daciaLogan.jpg'
alt="dacia logan"
fill
style={{objectFit:'cover'}}
/>
2) Sizes
The sizes property define how the image will scall in different screens , its like the media query in pure css<Image
src='/images/daciaLogan.jpg'
alt="dacia logan"
width={2300}
height={300}
sizes="(max-width: 768px) 60vw, (max-width: 1200px) 80vw, 600px"
/>
This string in the sizes property means :
- On screens ≤ 768px, the image takes 60% of the viewport width (60vw).
- On screens ≤ 1200px, the image takes 80% of the viewport width (80vw).
- On larger screens, the image is fixed at 600px width.
II) Optimizing Fonts
Fonts can seriously slow down our site if we are not careful. The biggest mistake is loading multiple font weights and styles you don’t even use.
So the best solution is to use the next/font Instead of Google Fonts Links , this approach makes it super easy to load fonts locally instead of fetching them from Google’s servers
This is an example of usage
import { Agdasima } from 'next/font/google';

const inter = Agdasima({
  subsets: ['latin'],
  weight: "700"
});

export default function Home() {
  return (
    <div>
        <h2 className={`${inter.className} text-2xl text-center`}>
          More than Logan, quite simply!
        </h2>
    </div>
  );
}
III) Managing Third-Party Scripts (The Silent Killers)
Some times we need to use external scripts like analytics , ads , forms widgets , etcs , but it can kill our performance if they load inefficiently
But our super hero nextjs provides a built-in way (next/script) to control when and how scripts load, so they don’t block rendering
For example using the google analytics external script
import Script from 'next/script';

export default function Home() {
  return (
    <div>
        <Script
          src='https://www.google-analytics.com/analytics.js"'
          strategy='lazyOnload'
        />
    </div>
  );
}
So in this case when we use the strategy='lazyOnload' we make sure that this script loads only after the page is interactive
But there is other strategies like :
- beforeInteractive : so as the name means its Loads before the page becomes interactive
- afterInteractive : this property is the default behavior , and it make the script Loads as soon as the page is interactive
IV) Removing Unused Packages
Let’s be real , how many times have we installed a package just to test it, then completely forgot about it?
But here’s the thing, unused packages don’t just sit there quietly , they slow down builds of our project
So luckily, we don’t have to manually go through package.json to remove them ; there’s a much easier way
you need just to run the depcheck in your project
npx depcheck
It’ll scan your project and list all the packages you’re not actually using
V) Lazy Loading & Code Splitting
Imagine you have a large component that should only appear when a user clicks a button. A common approach is to import it normally like this
import HeavyComp from "@/comp/HeavyComp";
import { useState } from "react";

export default function HeavyTesting() {
  const [isHeavyComp , setIsHeavyComp] = useState<boolean>(false)
  return (
    <div>
        <h1>Show The Heavy Component</h1>
        <button onClick={()=> setIsHeavyComp(true)} >Show</button>
        {
          isHeavyComp
          &&
          <HeavyComp />
        }
    </div>
  );
}
The Problem
With this setup, <HeavyComp /> gets bundled with the parent component. That means even if the user never clicks the button, they’re still downloading and loading that heavy component. Not good for performance
The Solution – Lazy Loading with next/dynamic
Instead of loading everything at once, we can dynamically import the component only when it’s needed using next/dynamic
Here’s how we optimize it
import dynamic from "next/dynamic";
import { useState } from "react";

const DynamicHeavyComp = dynamic(()=> import("@/comp/HeavyComp"),{
  loading : ()=> <p>loading ...</p> ,
  ssr : false
})

export default function HeavyTesting() {
  const [isHeavyComp , setIsHeavyComp] = useState<boolean>(false)
  return (
    <div>
        <h1>Show The Heavy Component</h1>
        <button onClick={()=> setIsHeavyComp(true)} >Show</button>
        {
          isHeavyComp
          &&
          <DynamicHeavyComp />
        }
    </div>
  );
}
By using dynamic imports, we make sure our app loads faster and serves only what’s necessary , when it’s necessary
VI) Tools for Performance Optimization
Optimizing your Next.js app is great, but how do we actually measure performance?
1) Lighthouse – Your Web Performance Inspector
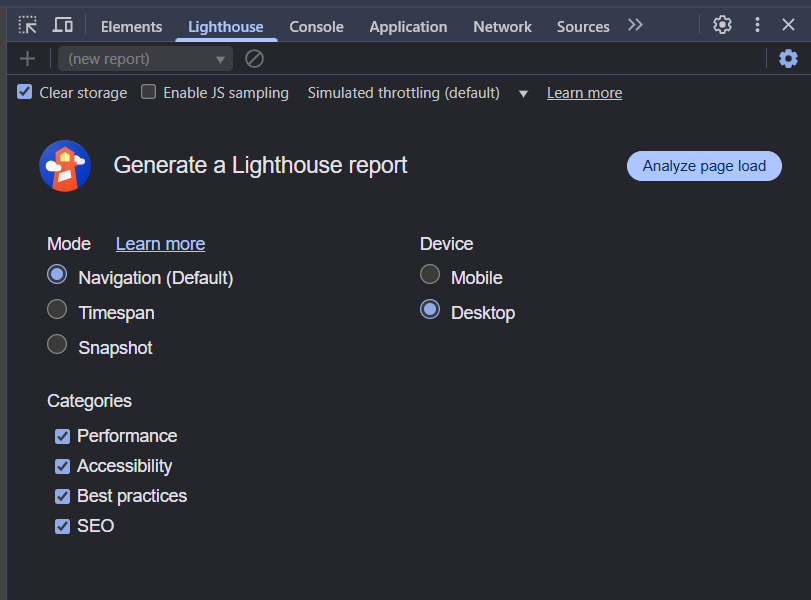
Lighthouse is built right into your browser’s DevTools, making it super easy to analyze your app’s performance.
How to Use It?
- Open DevTools (F12 or Ctrl + Shift + I in Chrome).
- Go to the Lighthouse tab.
- Click Analyze page load and wait for the results.

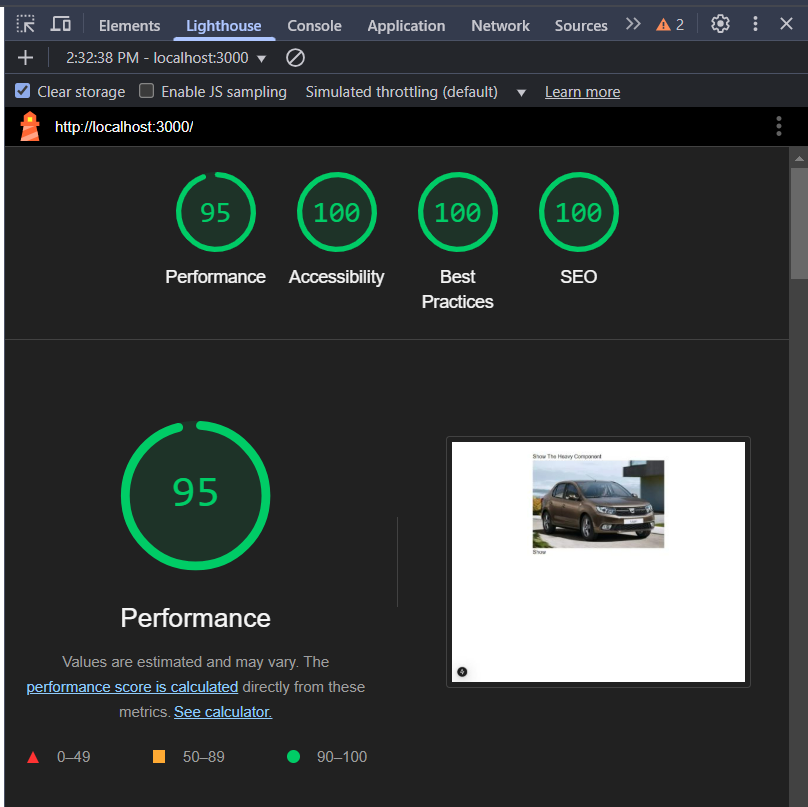
Example of Lighthouse Report

Lighthouse focuses on Core Web Vitals, which are key metrics for user experience
- LCP (Largest Contentful Paint): Measures loading performance.
- CLS (Cumulative Layout Shift): Checks visual stability.
- FID (First Input Delay): Measures interactivity.
You can learn more about Core Web Vitals here
Conclusion
At the end , optimizing a Next.js app is all about making it feel fast for users. nobody likes a slow website, and with just a few steps like optimizing images, lazy loading components, and cleaning up unused packages can seriously boost performance of our apps